
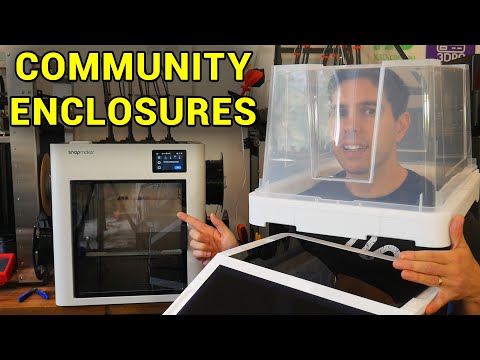
Why Your Snapmaker U1 Needs an Enclosure
The Snapmaker U1 toolchanger has impressed many 3D printing enthusiasts. However, the factory enclosure remains unavailable. This leaves users seeking alternative solutions.
YouTube creator Teaching Tech recently tested two community-designed Snapmaker U1 enclosure top covers. Both options cost far less than official accessories. Let’s explore what he discovered.
The Importance of Printer Enclosures
Enclosures do more than look professional. They maintain consistent temperatures during prints. This reduces warping and improves layer adhesion.
For materials like ABS and ASA, temperature control is essential. Even PLA benefits from draft protection. An enclosed printer also runs quieter and contains fumes.
Budget Constraints Drive Innovation
Official enclosures often cost hundreds of dollars. Community designers create alternatives using common materials. These DIY options save money without sacrificing function.
First Community Design: The Simple Approach
The first top cover uses basic construction methods. It focuses on ease of assembly and low cost. Key features include:
- Readily available materials from hardware stores
- Minimal 3D printed components needed
- Quick installation process
- Good temperature retention for most materials
This design works well for casual users. It provides adequate protection without complexity.
Second Community Design: Enhanced Features
The second option offers more advanced capabilities. It requires slightly more effort to build. However, the benefits may justify the extra work.
Teaching Tech evaluated both designs side by side. Each has distinct advantages depending on your needs.
Comparing Build Complexity
Simple designs appeal to beginners and time-strapped makers. Complex designs suit those wanting maximum performance. Consider your skill level and available time.
Materials and Construction Tips
Most DIY enclosures use acrylic or polycarbonate panels. These materials offer good visibility and heat retention. Proper sealing at joints prevents heat loss.
When building your enclosure, consider these factors:
- Panel thickness affects insulation quality
- Hinged access improves usability
- Ventilation prevents electronics overheating
- LED lighting helps monitor prints
Understanding how to choose the right material also applies to enclosure construction.
Temperature Performance Results
Both designs improved temperature stability significantly. The enclosed space reached and maintained higher ambient temperatures. This matters especially for temperature-sensitive filaments.
ABS printing becomes much more reliable with proper enclosure. Warping issues decrease dramatically. Layer adhesion improves across the entire print.
Noise Reduction Benefits
An unexpected benefit emerged during testing. Both enclosures reduced printer noise noticeably. This makes overnight printing more neighbor-friendly.
Cost Comparison and Value
Community designs cost a fraction of official options. Materials typically run under fifty dollars total. Your time investment depends on chosen complexity.
For those needing professional-grade results, JawsTec offers industrial 3D printing services. Sometimes outsourcing complex projects makes more sense than DIY solutions.
Which Design Should You Choose?
Your choice depends on several factors. Consider your primary printing materials. Think about how often you’ll access the printer.
Beginners should start with simpler designs. Advanced users might prefer feature-rich options. Both approaches solve the core problem effectively.
Final Thoughts on DIY Enclosures
The 3D printing community continues creating innovative solutions. These Snapmaker U1 enclosure options prove that point. Budget-conscious makers can achieve excellent results.
Watch Teaching Tech’s full video for detailed build instructions. Then decide which approach fits your workshop best.
Sources
Source: Testing two community Snapmaker U1 top covers – Cheap enclosures by Teaching Tech (YouTube) — https://www.youtube.com/watch?v=EYWCr87ZBDg
The factory lid still not shipping is why these two community U1 top covers matter. A chamber that holds even 8-10C above ambient is enough to keep ABS corners from lifting, and both designs Teaching Tech ran did that without a $300 official kit. I would start with the simple hardware-store cover if most of the work is PLA and PETG: fewer printed parts, faster to rebuild if a panel cracks. Switch to the enhanced lid once you are running ASA or need hinged access so you are not lifting the whole top mid-print. Acrylic is fine under ~45C; polycarbonate if the chamber sits hotter. Vent the electronics bay either way or the toolchanger boards cook. I still print the bracket set first as a cheap STL fit-check on the frame before cutting panels. Printable STLs at luphra.com are useful for that geometry check.