
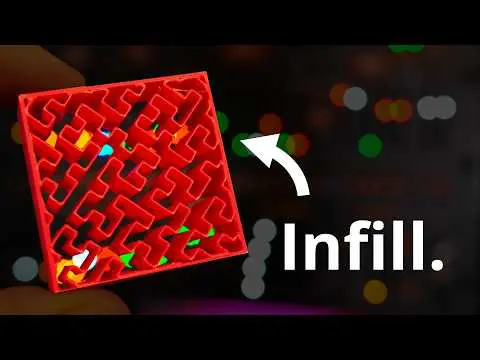
Why 3D Printing Infill Matters
Choosing the right 3D printing infill can save hours of print time. It also reduces material waste significantly. Yet many makers stick with default settings without understanding their options.
In a helpful video, YouTube creator Makers Muse breaks down infill types. He explains when each pattern works best. This guide shares those practical takeaways for your next project.
Understanding Infill Basics
Infill is the internal structure inside your 3D printed parts. It sits between the outer walls and top/bottom layers. The pattern and density you choose affect strength, weight, and print time.
Infill Percentage Explained
Most slicers default to 20% infill density. This works for many general-purpose prints. But you can adjust from 0% (hollow) to 100% (solid).
- 0-10%: Decorative items with minimal stress
- 15-25%: General purpose functional parts
- 30-50%: Parts needing moderate strength
- 50-100%: High-stress mechanical components
Common Infill Patterns Compared
Your slicer offers many pattern options. Each has unique properties. Here are the most useful ones to know.
Grid and Lines
Grid pattern creates a simple crosshatch structure. It prints quickly and works for basic projects. Lines pattern is even faster but offers less strength.
Gyroid Infill
Gyroid has become a popular choice among makers. It provides consistent strength in all directions. The curved structure also allows better airflow for flexible parts.
Cubic and Honeycomb
Cubic infill distributes force evenly through your part. Honeycomb patterns look impressive but take longer to print. Both work well for structural applications.
Practical Tips for Choosing Infill
Match your infill to your part’s actual use. A decorative figure needs less infill than a tool handle. Think about where stress will occur.
- Use lower infill for prototypes and test prints
- Increase density only where loads are applied
- Consider wall count as much as infill percentage
- Gyroid works great for parts needing flexibility
Walls vs Infill for Strength
Here’s a key insight from the video. More wall perimeters often add strength better than more infill. Three or four walls can make a bigger difference than jumping from 20% to 50% infill.
This matters because walls print faster than infill. You get stronger parts without wasting material. It’s a win-win approach.
When to Use Special Patterns
Some situations call for specific infill types. Understand when to break from standard choices.
Flexible Filament Needs
Printing with TPU or other flexible materials? Gyroid infill compresses more evenly. This creates better cushioning effects. Learn more about thermoplastic polyurethane 3D printing for flexible projects.
Maximum Strength Applications
For parts under heavy load, consider your overall design. Material choice matters as much as infill. Check out the strongest 3D printing materials for demanding applications.
Save Time and Material Today
Optimizing 3D printing infill is one of the easiest improvements you can make. Start by questioning your slicer defaults. Test different patterns on small samples first.
For production parts or professional projects, consider industrial printing services. JawsTec offers optimized settings for every material. Get a quote to see how professional printing can improve your results.
Remember: the best infill is the least you need. Print smarter, not slower.
Sources
Source: What infill should you use? 3D Printing Mastery by Makers Muse (YouTube) — https://www.youtube.com/watch?v=vAA0YSE2r_o
The walls-vs-infill takeaway from Makers Muse is the one that actually changes print time: three or four perimeters at 15–20% usually beat jumping from 20% to 50% cubic, and walls finish faster than dense infill. Gyroid is the pattern I keep for parts that get loaded off-axis or in TPU, because it does not leave those weak grid planes. For a first functional prototype I still drop to 10–15% lines just to get a slicable mesh on the bed, then only bump density along the load path. Printable STLs at luphra.com are useful for that check before you spend filament on a 50% infill guess.