
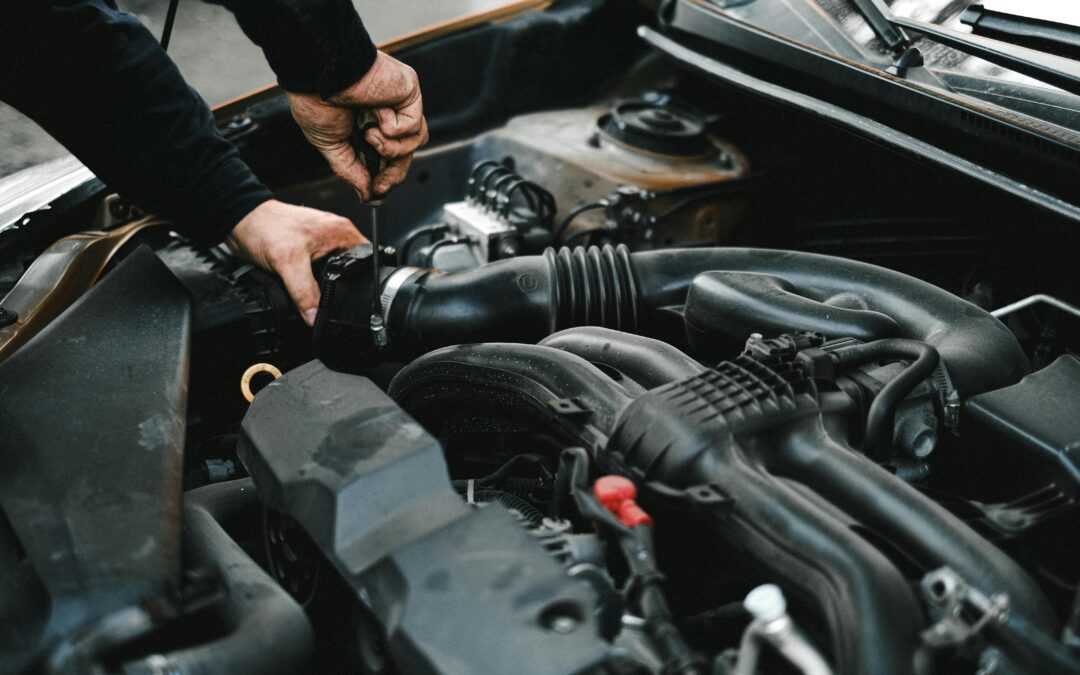
What is a Restromod?
As described by Restromod Academy, “a restromod is a classic car that has been restored and modified — a seamless combination of both the old and new.” In short, restromoding is the practice of transplanting modern performance, technology, and drive ability into the bones of a classic vehicle. Think a 1969 Camaro running a modern LS engine, or a first-gen Ford Bronco fitted with updated suspension, power steering, and climate control — all while keeping that unmistakable vintage silhouette.
Restromods have been a passionate corner of car culture for decades. They represent the best of both worlds: the timeless style and character of a classic, with the reliability, safety, and performance that modern drivers expect. Whether you’re chasing track-day numbers or simply want a daily driver that turns heads, the restromod philosophy is about making a classic car better — on your terms.
But here’s the challenge every builder eventually hits parts. Classic vehicles weren’t engineered with modern upgrades in mind. Brackets don’t line up. Mounting points don’t exist. Out-of-production trim pieces are impossible to source. And custom fabrication — the traditional answer — can be devastatingly expensive. That’s exactly where 3D printing steps in as a game-changing tool for restromod builders.
What is 3D Printing?
In case you’re unfamiliar, 3D printing — also called additive manufacturing — is the process of building three-dimensional objects by depositing material layer by layer from a digital file. Unlike subtractive manufacturing (where you cut material away) or traditional casting (which requires expensive tooling), 3D printing builds up only what it needs, reducing waste and dramatically cutting lead times.
There are several distinct processes under the 3D printing umbrella, each with different strengths for automotive applications:
FDM (Fused Deposition Modeling) is the most accessible process and the entry point for most builders. It uses spools of plastic filament — PLA, ABS, PETG, Nylon, TPU — melted and deposited layer by layer. A capable desktop FDM printer starts under $300, making it the most cost-effective car parts manufacturing method available to home builders. Best for brackets, mockups, trim pieces, and interior components.
MJF (Multi-Jet Fusion) fuses powdered nylon with a binding agent and ink. The result is strong, versitile parts with no supposrt material needed. MJF is adaptable to many applications like functional load components or complex ones.
SLA and MSLA (Resin Printing) use UV light to cure liquid resin into highly detailed parts. The surface finish is far smoother than FDM, making resin ideal for high-detail trim pieces, knobs, emblems, and gauge surrounds where appearance matters.
SLS (Selective Laser Sintering) fuses powdered nylon or glass-filled nylon with a laser. The result is strong, functional parts with no support material required. SLS is well-suited for ducting, functional housings, and structural components that see moderate loads.
Metal Printing (DMLS/SLM) uses metal powder fused by a high-powered laser to produce parts in stainless steel, aluminum, or titanium. This is the premium tier — used for engine brackets, suspension components, and heat-critical parts where plastic simply won’t do. Most builders access metal printing through professional print services rather than in-house machines.
The real cost of building a Restromod
Restoring and modifying a classic car is expensive — that’s no secret. But what surprises many first-time builders is where the costs accumulate. It’s rarely the headline items like the engine swap or the paint job. The budget killers are the small stuff: the adapter plates, the custom brackets, the unavailable clips, the discontinued sensors, the trim pieces that haven’t been in production since the 1970s.
Traditional solutions are slow and costly. A custom-fabricated bracket at a local shop might run $200 to $500 in labor for a simple piece. Sourcing NOS (new old stock) parts through specialty vendors means premium pricing and uncertain availability. And waiting on a machined part can pause a build for weeks.
3D printing changes that equation entirely. Parts that once required hours of machining can be designed in CAD and printed overnight. You can prototype fitment before committing to expensive materials. You can iterate on a bracket three times in a weekend for the cost of a few dollars of filament. For restromod builders looking for cost-effective car parts solutions, additive manufacturing is one of the most practical tools available today.
Why 3D Printing works for Restromods
Custom Fit: Design parts to your exact measurements. No more trying to force a modern component into a classic mounting point or grinding away material that doesn’t belong.
Cost Savings: Prototype and iterate for cents per gram rather than hundreds of dollars per shop visit. Even complex custom parts cost a fraction of traditional fabrication.
Speed: Go from concept to physical part in hours. Keep build momentum instead of waiting weeks for custom fabrication or chasing down a vendor for an out-of-stock item.
No Tooling Required: No dies, no molds, no minimum order quantities. Print a single one-off part as easily as a production run.
Rare and Discontinued Parts: Reproduce discontinued trim, clips, and components from a scan or reference photo. Pieces that haven’t been available since original production can live again.
Iteration Without Risk: Print a draft in cheap PLA to verify fitment before committing to expensive materials or having a piece machined. This one habit alone saves significant money and frustration over the course of a build.
How to use 3D Printing in your Restromod build
Whether you own a printer or plan to use a local print service, the workflow for integrating 3D printing into a restromod is straightforward.
Step 1 — Identify the Problem Part
What doesn’t fit? What’s unavailable? What would you fabricate if you had unlimited budget? These are your 3D printing candidates. Adapter plates, sensor brackets, trim clips, ductwork, console inserts, and wiring harness guides are all excellent starting points.
Step 2 — Measure and Model
Use digital calipers to capture key dimensions, then model the part in CAD software. Fusion 360 is free for hobbyists and is one of the most capable tools available. FreeCAD and Onshape are solid free alternatives. If modeling from scratch isn’t your thing, platforms like Thingiverse, Printables, and GrabCAD host thousands of community-made automotive files that may get you most of the way there.
Step 3 — Choose the Right Material
Match the material to the application. PETG is the workhorse choice for general brackets and under hood use — it handles heat and chemicals better than PLA. Nylon or ASA are better for higher-temperature environments. TPU is ideal for flexible seals and grommets. Resin is best for high-detail aesthetic parts. Reserve metal printing for load bearing or heat-critical components where plastic isn’t appropriate.
Step 4 — Print a Prototype First
Before printing in your final material, print a cheap PLA draft. Test the fitment, verify measurements, and catch design issues before spending time on a functional material print. This single step saves enormous amounts of frustration and wasted material.
Step 5 — Finish and Install
Sand, prime, paint, or wrap printed parts to match your build. Use threaded heat inserts for any bolted connections — they’re far stronger than printed threads and give parts a professional, factory-quality feel. Many restromod builders find that properly finished printed parts are indistinguishable from factory components.
Where 3D Printing shines in a Restromod
Interior and Trim Restoration
Decades-old interiors are often the hardest part of a classic car to source. Dash inserts, switch bezels, vent surrounds, console pieces, and trim clips all break down over time — and many haven’t been available new since the original production run. 3D printing lets builders recreate these parts to OEM accuracy, or redesign them entirely to accept modern switches, screens, and HVAC controls while maintaining a period-correct appearance.
Engine Bay Brackets and Adapters
Swapping a modern LS, Coyote, or turbocharged four-cylinder into a classic chassis inevitably means mounting hardware that simply doesn’t exist. 3D-printed mockup brackets let you iterate quickly to find the perfect position before having a final version welded up in steel. Some builders use SLS-printed nylon or metal parts for lighter accessory brackets on a permanent basis.
Sensor and Electronics Integration
Modern builds mean modern electronics — and classic cars weren’t designed with O2 sensor bungs, MAP sensor taps, or wideband controller mounts in mind. Small 3D-printed brackets and housings for sensors, relays, fuse blocks, and ECUs are one of the most practical applications in restromod building. These parts are small, structurally simple, and perfectly suited to desktop FDM printing.
Air Ducting and Intake Components
Cold air intakes, intercooler pipes, and custom ducting are expensive when sourced through specialty vendors — and often don’t exist at all for uncommon engine swaps. 3D-printed ducting in high-temp PETG or ABS can be custom-routed to fit your exact engine bay layout, reducing costs dramatically compared to custom silicone or aluminum fabrication.
Suspension and Chassis Prototyping
While printed plastics are not a substitute for steel in load-bearing suspension components, they are invaluable for prototyping. Print a mockup camber plate, a test jig for control arm geometry, or a trial spacer before committing to metal. This approach catches fitment and geometry issues early, saving significant shop time and material cost.
The Bottom Line
The restromod community has always celebrated ingenuity — the builders who figure out how to make something work when the factory never intended it to. 3D printing is the latest and most powerful tool in that tradition. It democratizes access to custom parts, compresses the build timeline, and makes cost-effective car parts a reality even for low-budget builders working out of a single-car garage.
Whether you’re recreating a lost dashboard trim piece, designing an adapter plate for a modern brake booster, or fabricating sensor brackets for an engine swap, additive manufacturing meets you where you are. The barrier to entry has never been lower — a capable FDM printer starts under $300, filament costs a few dollars per pound, and a growing library of free CAD tools means the only real limit is your ability to measure and model.
The classic car you love deserves to be driven — confidently, reliably, and exactly the way you envisioned it. 3D printing helps you get there faster, and for a fraction of what traditional custom fabrication would cost. Get an instant quote today.